Fine-tuning your Brand Profile in the Data Hub
How to improve your Brand Profile with URLs, documents, and custom information, and how to create additional profiles for other brands or clients.
Written By Ally | Team Assistant
Last updated 6 days ago
Your Brand Profile is what teaches every agent who you are: your name, your website, your positioning, and the rules they should follow. When you sign up, Whaaat AI creates your first Brand Profile automatically from the single website URL you enter.
Fine-tuning that profile is the recommended first step before you start working with the agents, because the richer the profile, the more on-brand every agent's output will be.
Before you begin
You already have one Brand Profile, created automatically at signup from your website URL. This guide covers improving that profile, and further down, creating additional ones. You do not need to create anything new to get started.
Fine-tune your existing Brand Profile
Open the Brand Profile switcher
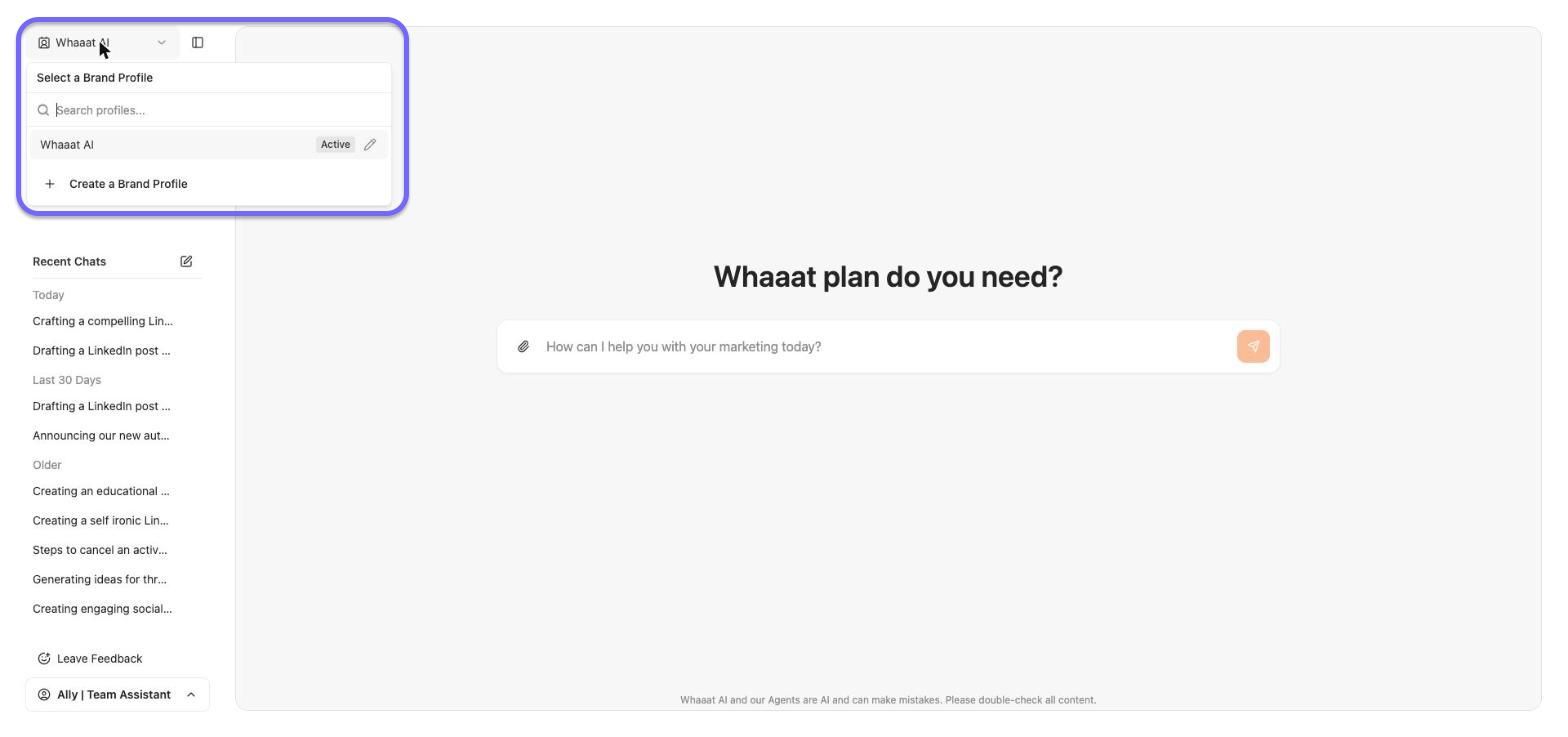
In the top-left corner, click the brand toggle showing your active profile name. A Select a Brand Profile panel opens, listing your profiles. Your current one is marked Active.
Open the profile for editing
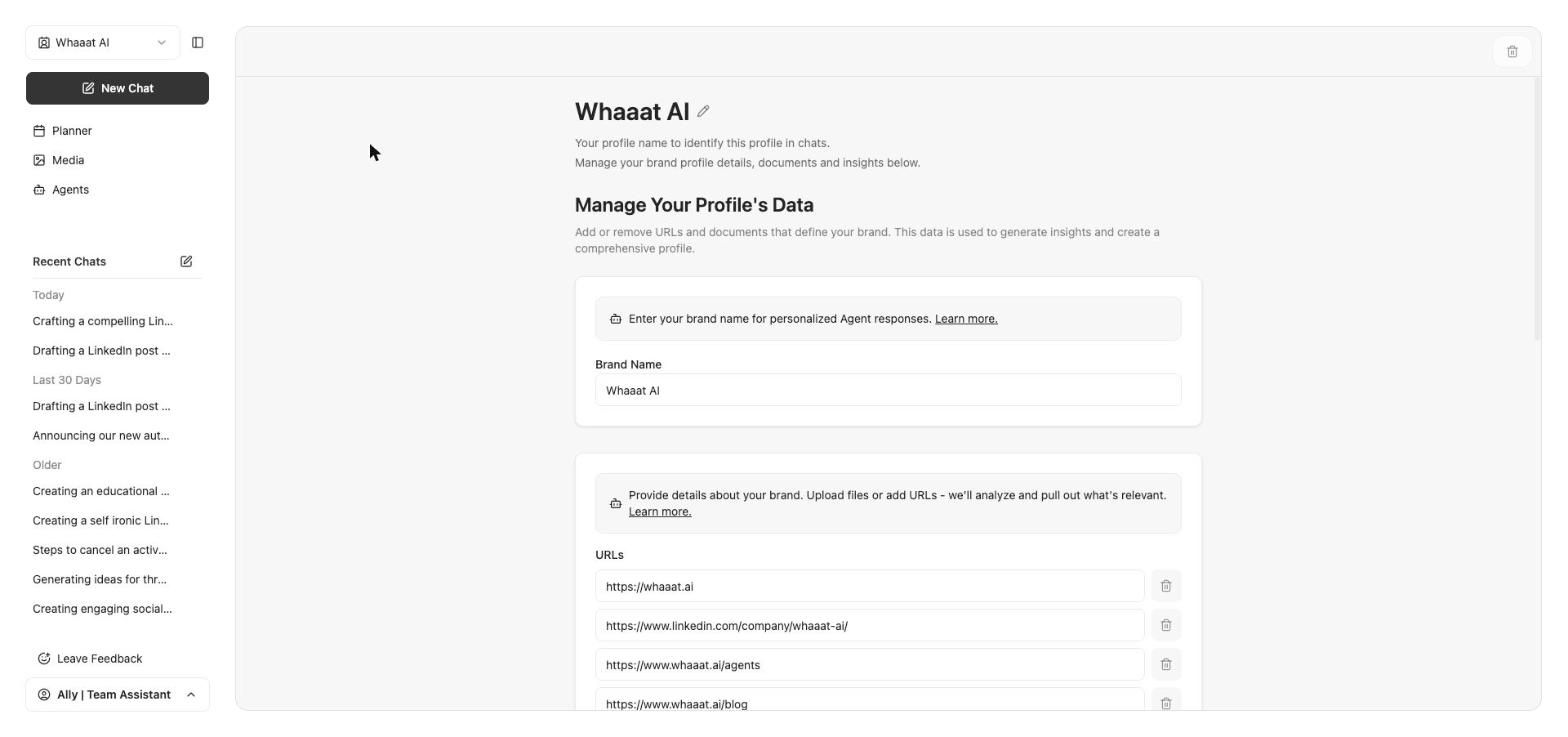
Click the pencil (edit) icon next to the active profile. The editor opens under the heading Manage Your Profile's Data.
Check your Brand Name
The Brand Name field is used for personalized agent responses. Confirm it is exactly how your brand should be referred to; e.g. MyCompany rather than My Company Inc.
Add the URLs that define your brand
Under URLs, add the links Whaaat AI should analyze: your homepage, LinkedIn, key landing pages, and blog. Use Add URL for more fields, and the trash icon to remove one. The system pulls out what is relevant.
Upload supporting documents / files
In the Files area, click to upload or drag and drop files. The limit is 20MB per file, and accepted formats are .pdf, .txt, .md, .jpeg, and .png.
Good candidates are a brand guide, a tone-of-voice document, a product one-pager, or past high-performing content.
Fill in Custom Information.
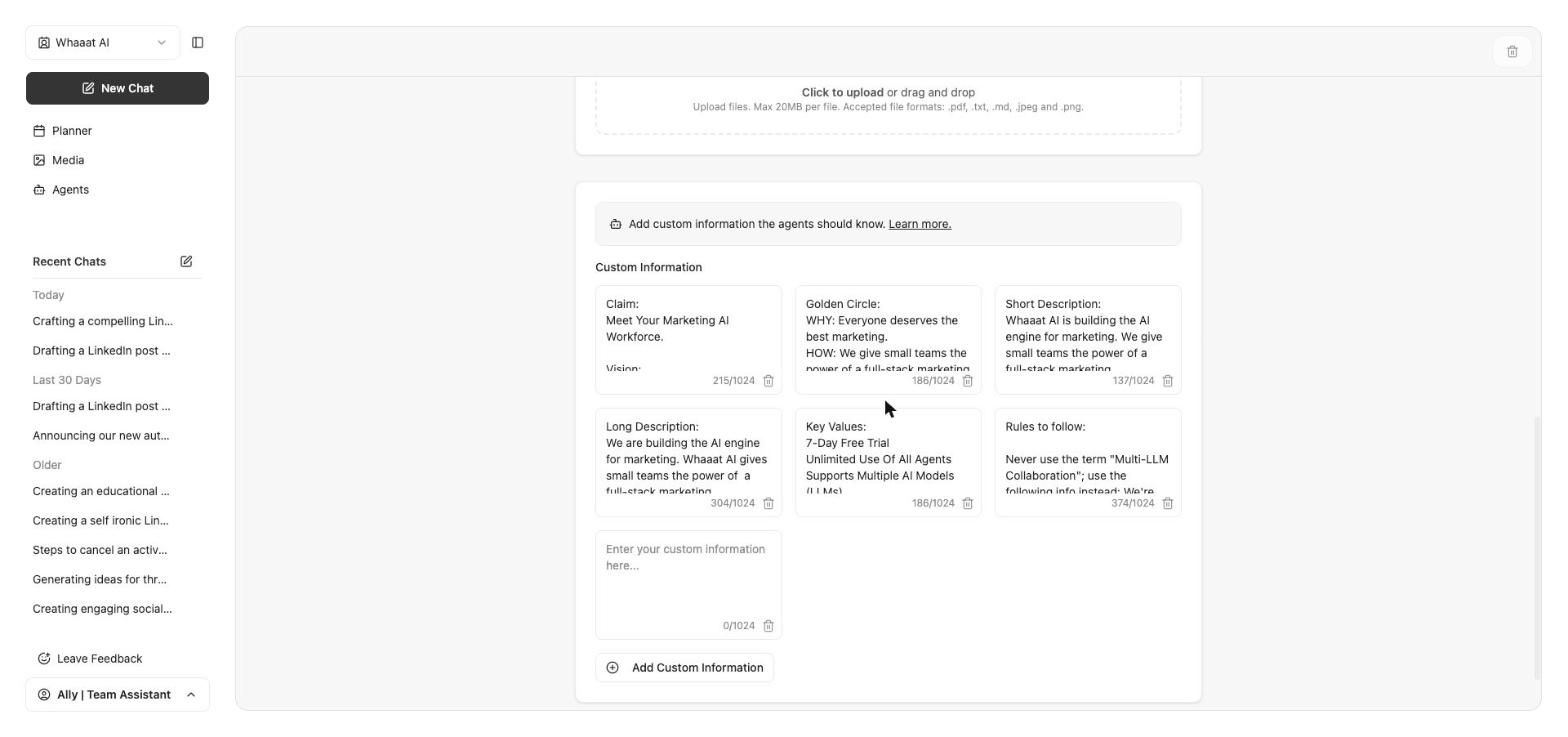
These are structured cards the agents read directly. You can enter any information you think is relevant. We recommend using things like: Company Claim, Golden Circle, a Short Description, your Vision, Long Description, your Key Values, and specific Rules to follow. Each card holds up to 1024 characters. Click Add Custom Information to add your own.
💡 The Rules to follow card is especially useful for naming phrases the agents must avoid or wording they must always use.
Save your changes
Click Update Brand Profile at the bottom. This button activates once you have made a change.
Create an additional Brand Profile
Yes, you can run more than one Brand Profile in a single account and switch between them from the top-left toggle. Create a new profile when the agents need to write for a clearly different brand or context, for example:
You want to keep a personal brand separate from your company brand; e.g. a founder’s profile
You run distinct sub-brands or product lines with their own voice and audience.
You want to use distinct Brand Profiles for different Social Channels; e.g. Instagram vs. LinkedIn
You want to test a different positioning without changing your main profile.
You manage marketing for more than one company or client, which is common for agencies and consultants.
❗ If all your content belongs to one brand, keep a single profile and enrich it instead. Several thin profiles perform worse than one well-maintained profile.
To create a new brand profile:
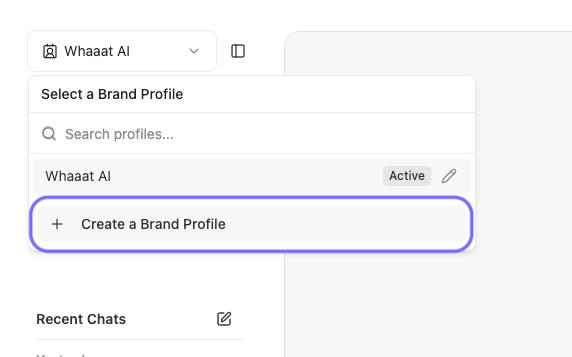
Click the brand toggle in the top-left corner to open Select a Brand Profile.
Click + Create a Brand Profile. The Create a new Brand Profile form opens.
Enter a Brand Name and all other information as mentioned before. The richer your brand profile, the better the agents’ content will be
Click Create Brand Profile. The new profile then appears in the Select a Brand Profile switcher, where you can set it active and fine-tune it further using the steps above.
Common issues
The Update Brand Profile button stays greyed out: it only activates after a change. Edit a field, then save.
An agent's output feels off-brand: confirm the active profile in the top-left toggle is the right one, and that your Custom Information and Rules to follow cards are filled in.
You cannot find where to edit a profile: the editor is reached only through the pencil icon in the Select a Brand Profile panel, not from the main left navigation.
Tips
Treat the profile as living content. Revisit it whenever your positioning, offers, or messaging change, because stale context produces off-brand output.
More signal beats more volume. A focused brand guide document plus sharp Custom Information usually outperforms a long list of loosely related URLs.
Related articles
Creating an Account · Working with agents · Meet your agents